
Samsung's latest flagship devices are two of the most
beautiful, powerful smartphones ever made. And amazingly enough, thanks to
legendary root developer Chainfire, the Samsung Galaxy S7 and Galaxy S7 edge
are about to get even more powerful.
Shortly after being released, a root method for these two
awesome phones was made available, and it's just about as quick, painless, and
easy as rooting can be. So if you're interested in modding your new S7 or S7
edge with all sorts of cool software tweaks, I'll go over the process in detail
below.
Before You Begin
The root utility we'll be using today works by unlocking
your device's bootloader.
This means that if your bootloader is not already unlocked, you will lose all
of the data on your device, and your warranty will become void.
On top of that, this process will trip KNOX, Samsung's
security layer for their mobile devices. This means that Samsung
Pay will no longer work once you've rooted. Tripping KNOX also means
that you may not be able to use enterprise services through your employer, so
please consider that before moving forward.
Bootloader unlocking has another downside—all U.S. carrier
variants of the Galaxy S7 and S7 edge have bootloaders that cannot be unlocked.
Therefore,this method will not work if you purchased your device from
AT&T, Sprint, T-Mobile, or Verizon, and there is no alternative root method
for these devices.
Beyond those specific carrier variants, this method will
also not work on any Galaxy S7 or S7 edge model that uses a Snapdragon 820
processor, so read this
guide to double-check your processor type before you get started.
If your device is one that can currently be rooted, and
you're okay with the downsides or rooting, then it's time to get started.
You'll need a Windows PC
and reliable USB data cable to use this method.
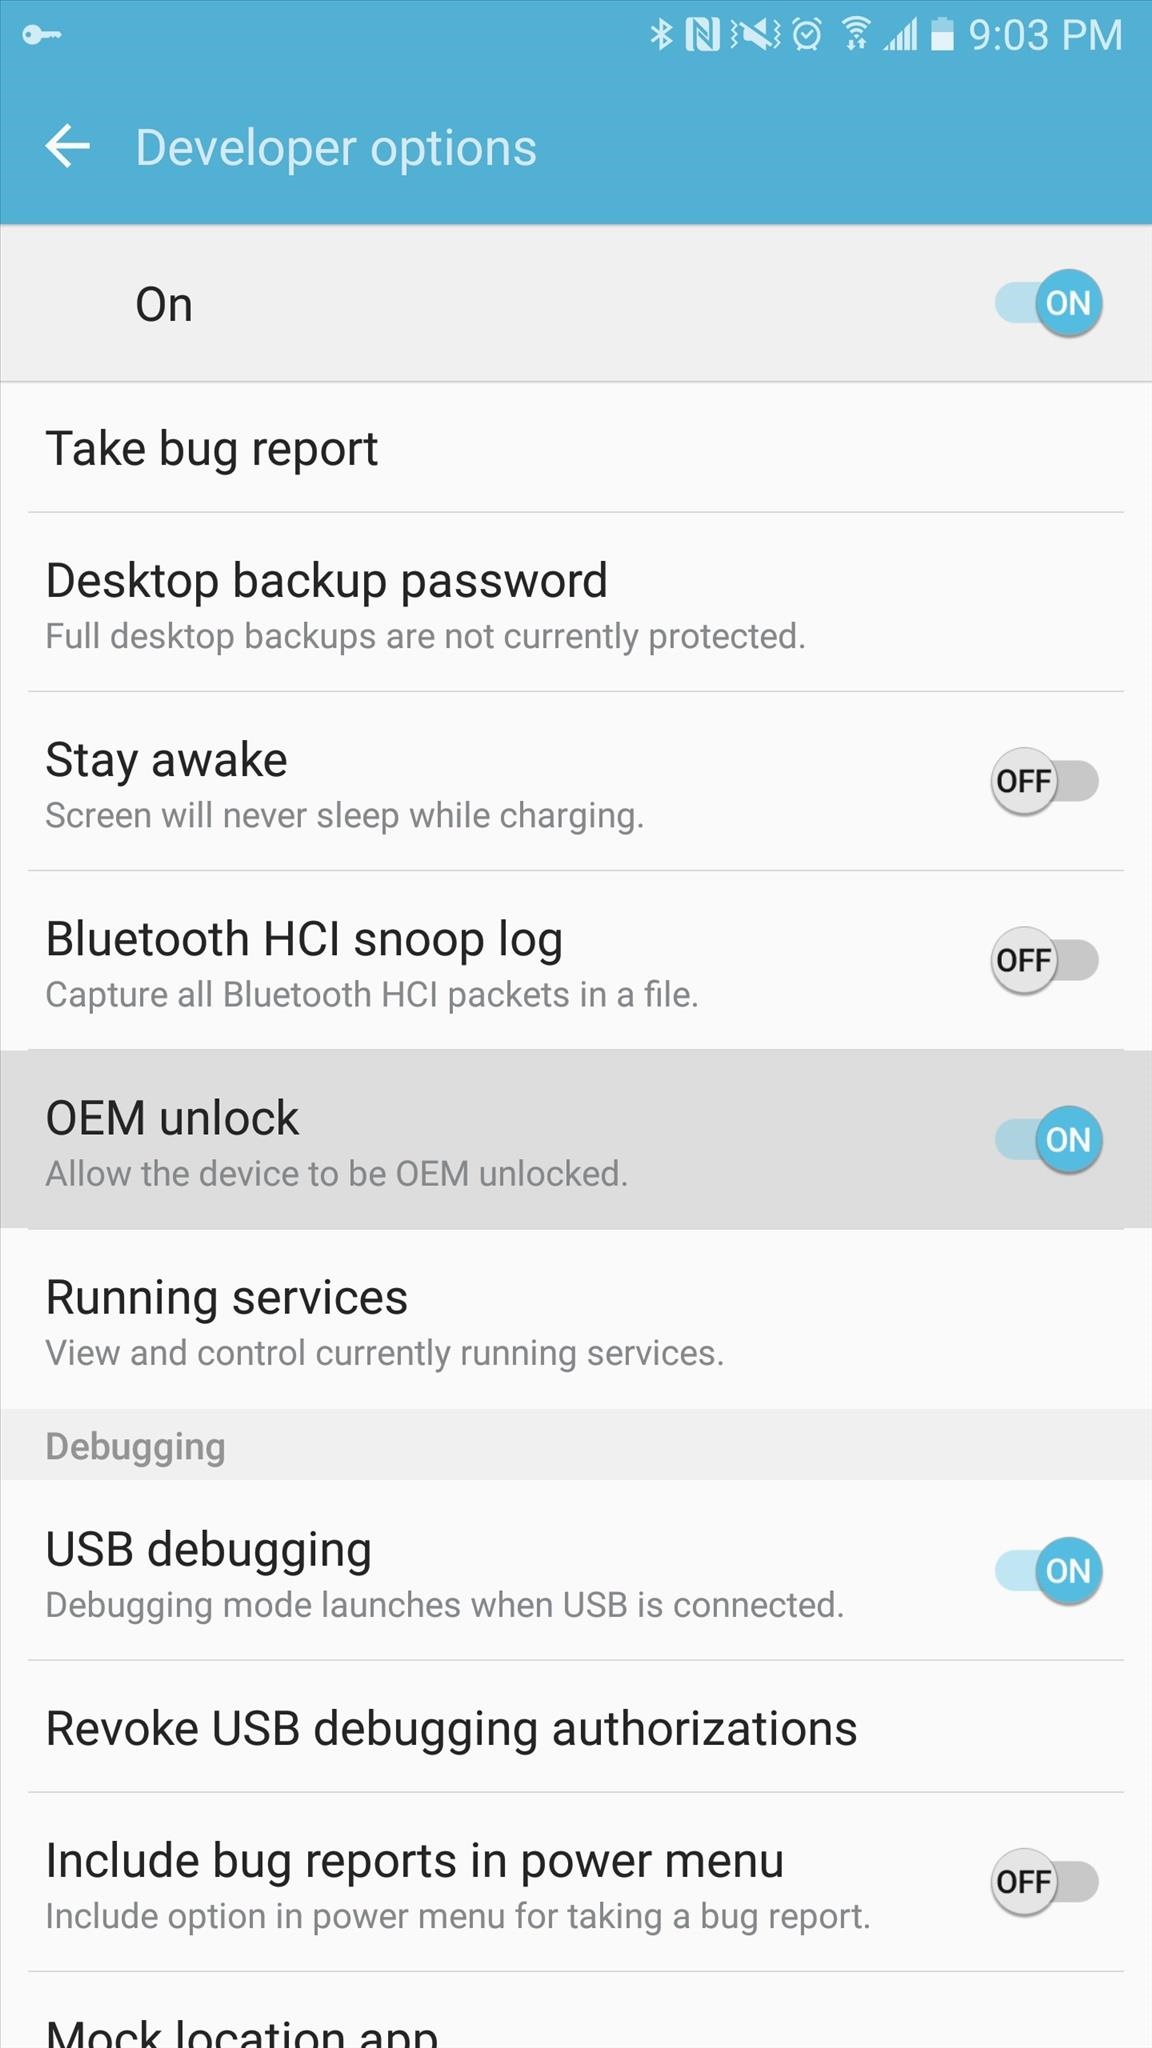
Step 1: Enable 'OEM Unlocking'
To get things started, there's a hidden setting you'll need
to enable on your Galaxy S7. First off, you'll need to enable the
"Developer options" menu, which can be accomplished using these
instructions.
Once you've done that, head to your phone's main Settings
menu and open the Developer options submenu that you just enabled.
From here, enable the "OEM unlock" option before proceeding.
Do not skip this step.

Step 2: Boot into Download Mode & Connect to Your PC
Next, power your phone completely off. From here, press and
hold the power, home, and volume down buttons simultaneously. This will take
you to Samsung's "Download mode" menu where you'll need to press the
volume up button to verify your choice. Once you've done that, plug your phone
into your PC with a USB data cable.

Step 3: Download the Samsung USB Drivers
On your Windows PC now, head to the following link to grab a
copy of the Samsung USB drivers. This is an EXE file, so simply launch it, then
follow the prompts to get the drivers installed on your system.
Step 4: Download & Extract CF Auto Root & Odin
Next up, you'll need to grab a copy of CF
Auto Root, which is the tool you'll be using to actually root your device.
So from your Windows PC, head to one of the links below to grab a copy of the
utility for your particular model.
Once you've taken care of that, extract the contents of the
ZIP into a folder you can access easily, and leave this folder open.
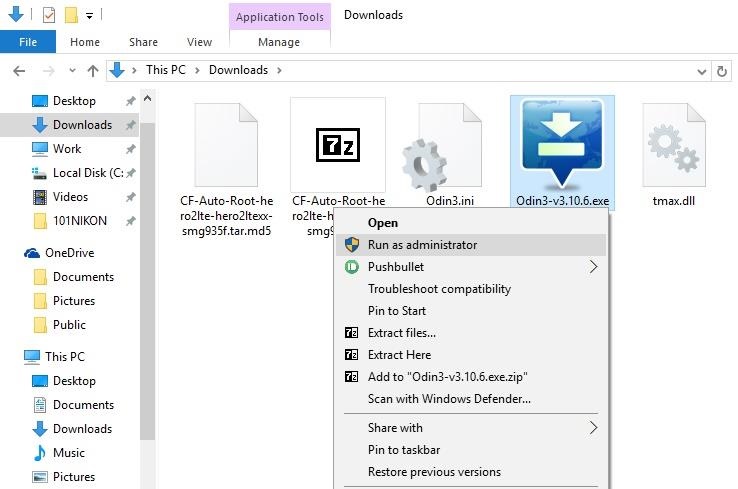
Step 5: Run Odin as an Administrator
Next, right-click the Odin3-v3.10.6.exe file that
was extracted from the CF Auto Root ZIP, then choose "Run as
administrator." This is an important step, because the root utility won't
be able to run properly without administrator privileges.
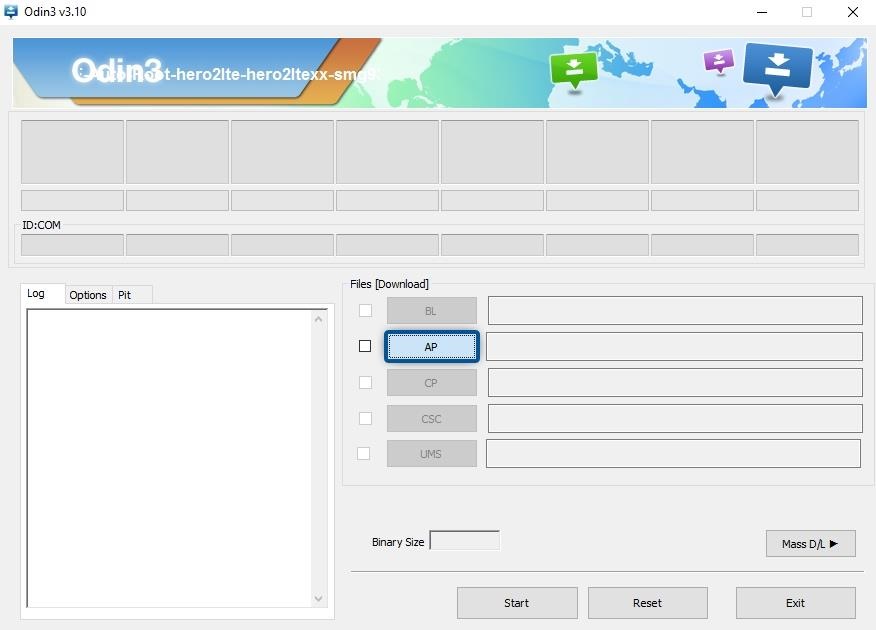
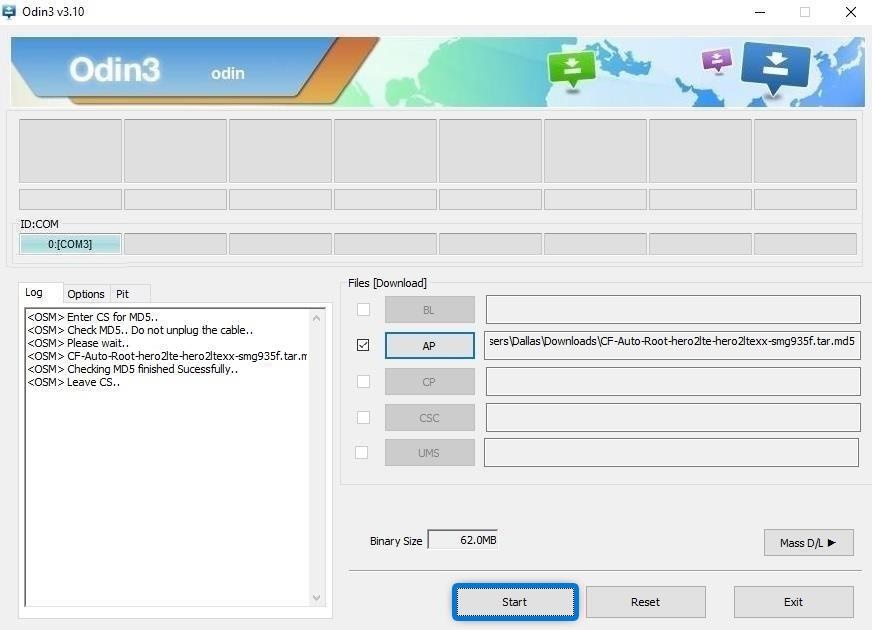
Step 6: Root Your Phone
At this point, it's time to get down to business. From
Odin's main menu, click the "AP" button in the middle of the screen,
then use the following menu to select the CF Auto Root tar.md5 file
from the ZIP you extracted earlier.
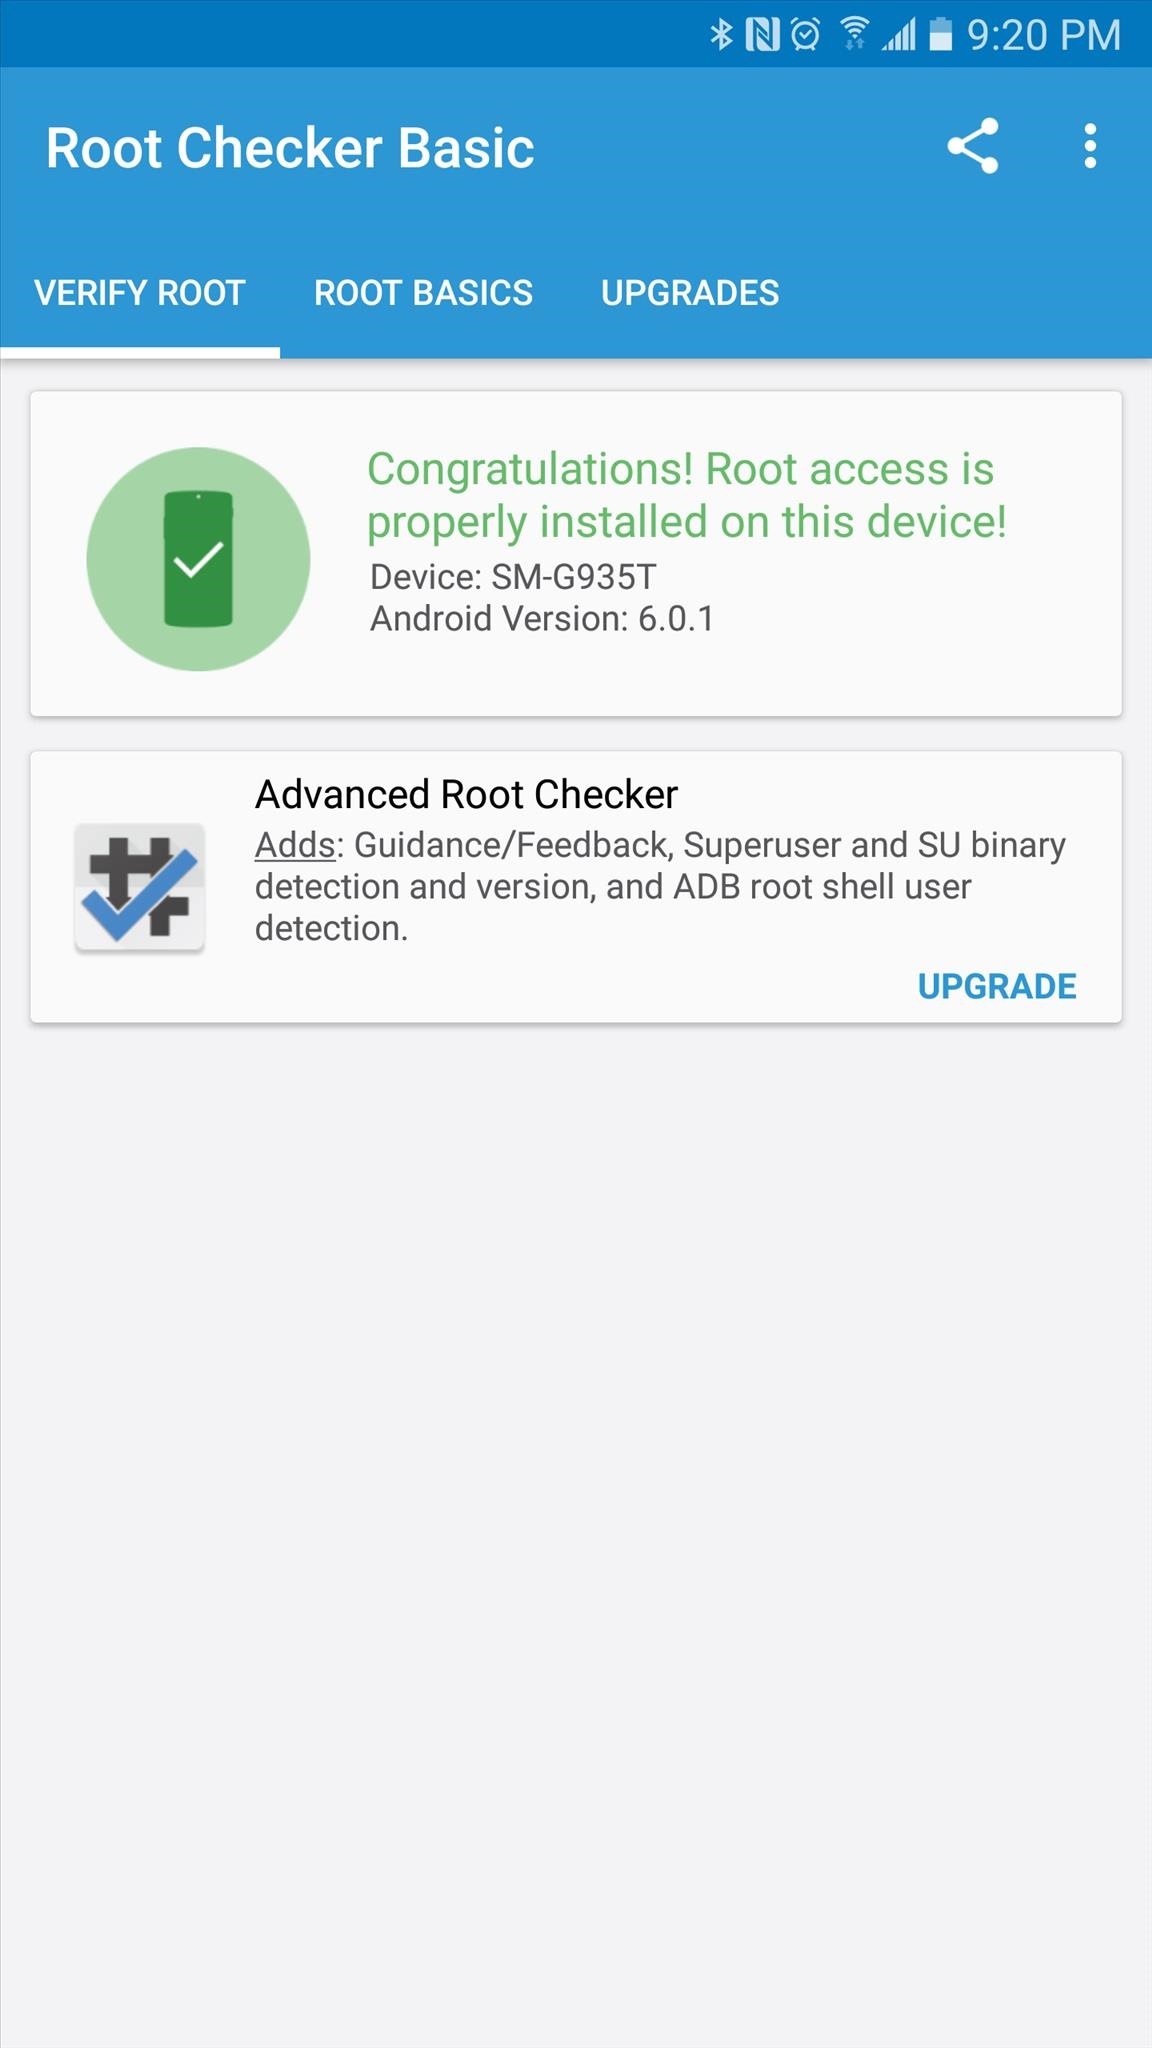
Step 7: Verify Root
When you get back up, your device should be fully rooted. To
verify this, download an app called Root Checker from developer joeykrim.
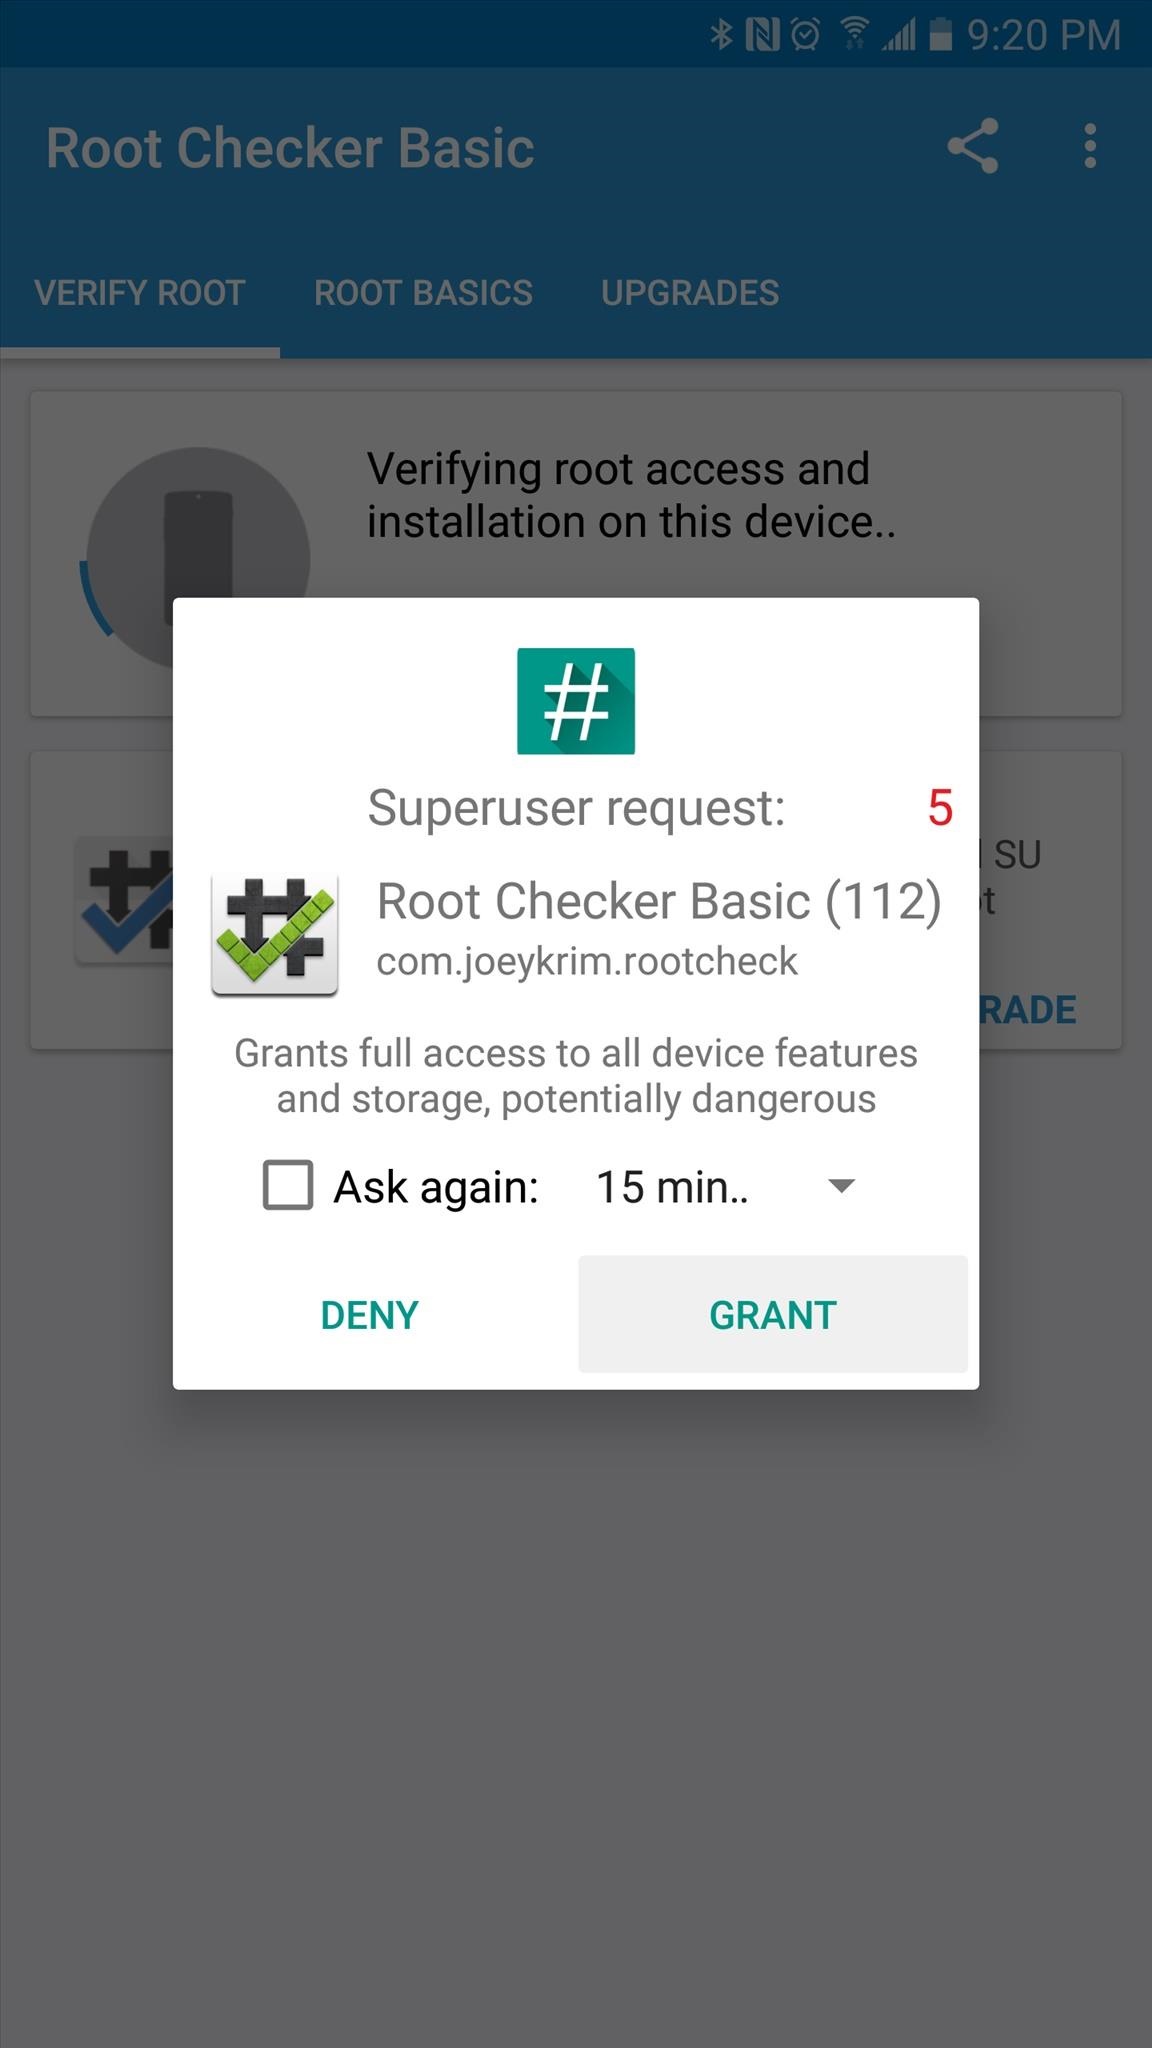
Once you've installed the app, simply open it up and tap
"Verify Root." From here, tap "Grant" when prompted to give
the app Superuser access, and if everything went off without a hitch, you'll
see a message saying "Congratulations! Root access is properly installed
on this device!"

No comments:
Post a Comment